looking
for mini-beasts
- how to sample
Why
sample?
The aim of sampling a habitat is to get a good idea of what is present.
This doesn't mean extracting the very last rock-gripping three-toed
lugbeetle from the entire area. A small sample, providing it is
done properly, will usually come up with about 70% of the species
that are there - and 100% of the commonest species.
You will be visiting a stream,
river, pond or lake for this exercise. Before you begin, go to 'Safety
First‘ (T3)
as well as 'Reducing the Risk' (T2)
and 'Surveys & Sampling' (T4)
in the Teaching Notes, you will then be prepared for your visit.
You will need a copy of the ‘Mini-beast
Identification' sheets (B06b)
to identify the creatures you find and the 'Mini-beast Bio-diversity
Survey’ (B06c)
sheet to record your findings. In addition you will need a tray
put the mini-beasts in and sampling equipment - see the list in
Surveys & Sampling - Organising Mini-bast Sampling Trips, Teaching
Notes 4
(T4).
Before taking a sample fill the
tray half full with water. Take one sample and empty the net into
the tray, to find out how read on…
 |
Correct position
for a scuffle sample |
There are different ways to look
for the little creatures that live in water. It all depends on where
you are looking for them! If you are exploring a stream then a scuffle
or kick sample may be best.
A ‘sample’ is something
that is a part of a whole. In this case it is impossible to look
at the entire stream, river, lake or even pond so instead we look
at part of it and to do this we take a sample.
• To take a scuffle or
kick sample, stand in the water facing down stream (with wellies
on) and hold the net with the opening pointing towards your toes
and just touching the bottom of the stream. Remain standing in the
same place and twist your feet from side to side, do this a few
times until you feel you have collected some creatures.
• If you are looking for
life in a pond, lake or river then using a throw net is probably
the best and safest way to collect water dwelling creatures for
a closer look.
 |
Sampling using
a throw net |
• A throw net is a deep net on a long length of cord. You
throw the net out into the deeper water letting it sink down to
the stream/river bed or bottom of the pond/lake. After doing this
the net is pulled back to the shore using the cord, which you should
keep a firm grip on.
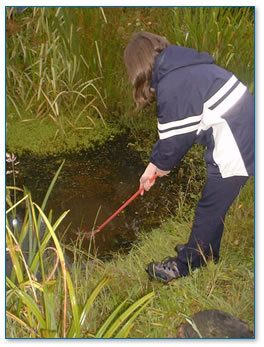
 |
Pond dipping |
• If you are undertaking
your survey between October and May it is best not to walk in rivers
or streams because this is the time of year when fish lay their
eggs (F02)
and you could crush them underfoot. So collect only samples using
a throw net or dipping net at this time.
• To empty the net, hold it over the tray
and gently turn the net inside out and dip it into the water in
the tray.
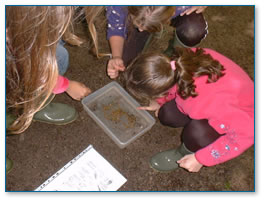
 |
Identifying mini-beasts
in a white tray |
• Once you have a sample, let it settle for a minute so that
all the particles of organic matter (tiny pieces of decaying plants
and animals) go to the bottom of the tray. The mini-beasts or invertebrates
(B09a) in the tray
will become more visible.
• Now you will be able to count how many different groups
of mini-beasts you have found in your sample. Look at the ‘Mini-beast
Identification Sheet’ this will show you all the different
groups of mini-beasts as well as some of the other creatures that
you might see in and around the stream/river or pond/lake that you
are sampling.
 |
Identifying mini-beasts |
• Look at the 'Mini-beast
Biodiversity Survey Sheet' (B06c).
You will be able to fill in the information about what you found
in and on the water.
• How many different groups of creatures
did you see?
You might have lots of
ticked boxes next to lots of different groups of creatures, or you
might only have a few ticks. There are for example hundreds of different
types of cased caddis fly which would be recorded in our survey
as one tick, so a low number of ticks means fewer groups not fewer
different creatures!
|

